Saturday, October 29, 2016

Older Painting Finally Finished

"The Blue Cabin"…16x20 Acrylic on Gesso Board

The painting above is finally finished. I started this in our motor home last summer in Montana. It sat around in my studio at home and I had lots of time to view it and decide to make changes to improve the composition. I will show you the original scene and the initial painting below. See if you can figure out the changes in the first painting and the finished one and figure out why I made the changes.

Original Photo
Initial Block In Painting

Hope you can see how a mundane photo can be a starting point for a more interesting painting. Just figure out what you liked that made you take the photo in the first place. Then figure out how to make your eye go to the center of interest and make your shapes and values interesting.

Back in the Painting Studio


I am finally back to painting. The season has changed and with fall upon us and some rainy days, my studio is nice and comfortable for painting. I chose a photo I took this summer in Canada. I cut and pasted the photo on my iPad and painted over the photo with my iPad pencil to plan out my colors and values before I began to paint. I posted the photo below without any changes.

Original Photo
iPad Rough Design.

As you can see in the finished painting below, I have made many changes to the photo above In order to create a better composition. First I moved the building over to the right side to balance better with the hills in the background. Then I changed the season to fall to create more color and interest in the vineyard. I also changed the sky to reflect a sense of weather and changed the lighting to create drama. I added some cypress trees to the foreground to add some depth and changed the foreground to a warmer color. The proportion of my painting surface was different then the photo was so my initial drawing was proportioned to fit that shape. I hope you agree that the changes made for a better painting.

Okanagan River Vineyard, Canada.....16x20 acrylic on gessoboard.

Wednesday, October 26, 2016

Layers of Art and Glass


This piece was a lesson learned. The top layer was painted with my glass powder aloe vera paints. The top layer included all the white flowers. The second layer was just a sifted layer of glass powders in yellow and green and some lavender. Both of the layers are clear glass and I fired them together at a full fuse schedule. When it was cool the I decided that the second layer was not dark enough and that next time I try this I need to double the amount of glass powder I use to get the effect I want. So to solve this problem and bring out the flowers more. I used another piece of opaque teal green glass that I painted stems and leaves on with glass line paint and sifted on more powders. I tack fused this piece before layering it with the first two already fused layers. Here is where the real lesson came in. I full fused this 3 layer piece at a conventional schedule in my Bonnie Glo Fiber Kiln, directly on the kiln washed and powdered floor of the kiln. After firing I reached in the kiln to pull out the piece and it had stuck to the kiln floor and pulled up several chunks of the floor. I thought that I was following the directions for the kiln but I came to find out that the manual was not worded correctly. Probably I should have at least used kiln paper or used a kiln shelf.  Fortunately the kiln was easily fixed by taking out four screws and flipping the bottom over. I was so relieved to find this out after I called the manufacturer. All and all I'm pretty happy how the glass piece came out though. I placed it in a stand up display and the piece has depth you can see layer to layer.

Thursday, October 20, 2016

Untitled

Glass Powder Painting

A new piece out of the kiln. I used black glass powder and sifted it all over a white piece of glass. Then I drew into the powder and subtracted the design by removing the powder and pushed it around. Next I used some of my homemade aloe vera glass powder paint to accent the design with green and yellow. I let it dry completly. Then fuse fired it on top of a clear piece of glass. Next I slumped it into a much larger platter mold, putting the glass crosswise in the center. The piece can be a free standing art piece or a dish for cheese, butter, appetizers, or a candle plate.


Tuesday, October 11, 2016

Please sign up by filling in your email above to subscribe to my blog

My Painting and Fused Glass Sketch Book

This is how I sketch my ideas for fused glass and painting. I use the "53 Paper" app as my sketchbook. It is with you always on your phone or your iPad. Because I use the Pencil with my iPad Pro it is a fantastic sketching tool in the studio or on the run. These ideas are for my next glass experiments.

The ideas are not necessarily the art but how to use a mold I already have for other shapes and sizes of glass. For instance I use a 9x12 platter mold and place a piece of glass crosswise across it to make a free standing art piece or candle shield. I also am going to try and make a snapshot photo holder by using the same mold and placing thick fiber paper between two pieces of glass to make a slot for the photo. The 53 Paper app makes it easy to handwrite notes and make diagrams. You can also bring in photos and make arrows and notes around them.


Monday, October 10, 2016

Please fill in your email above to subscribe to my blog. THanks.

More Fall Fused Glass

Finishing up the scraps of fall colored glass left over from making the platter. I used a white base glass with strips on top. This piece is all opaque. This is a cheerful colorful bowl to accompany the platter.


Saturday, October 8, 2016

Please fill in your email above to subscribe to my blog.

Fall Colors.....Fused Glass Platter

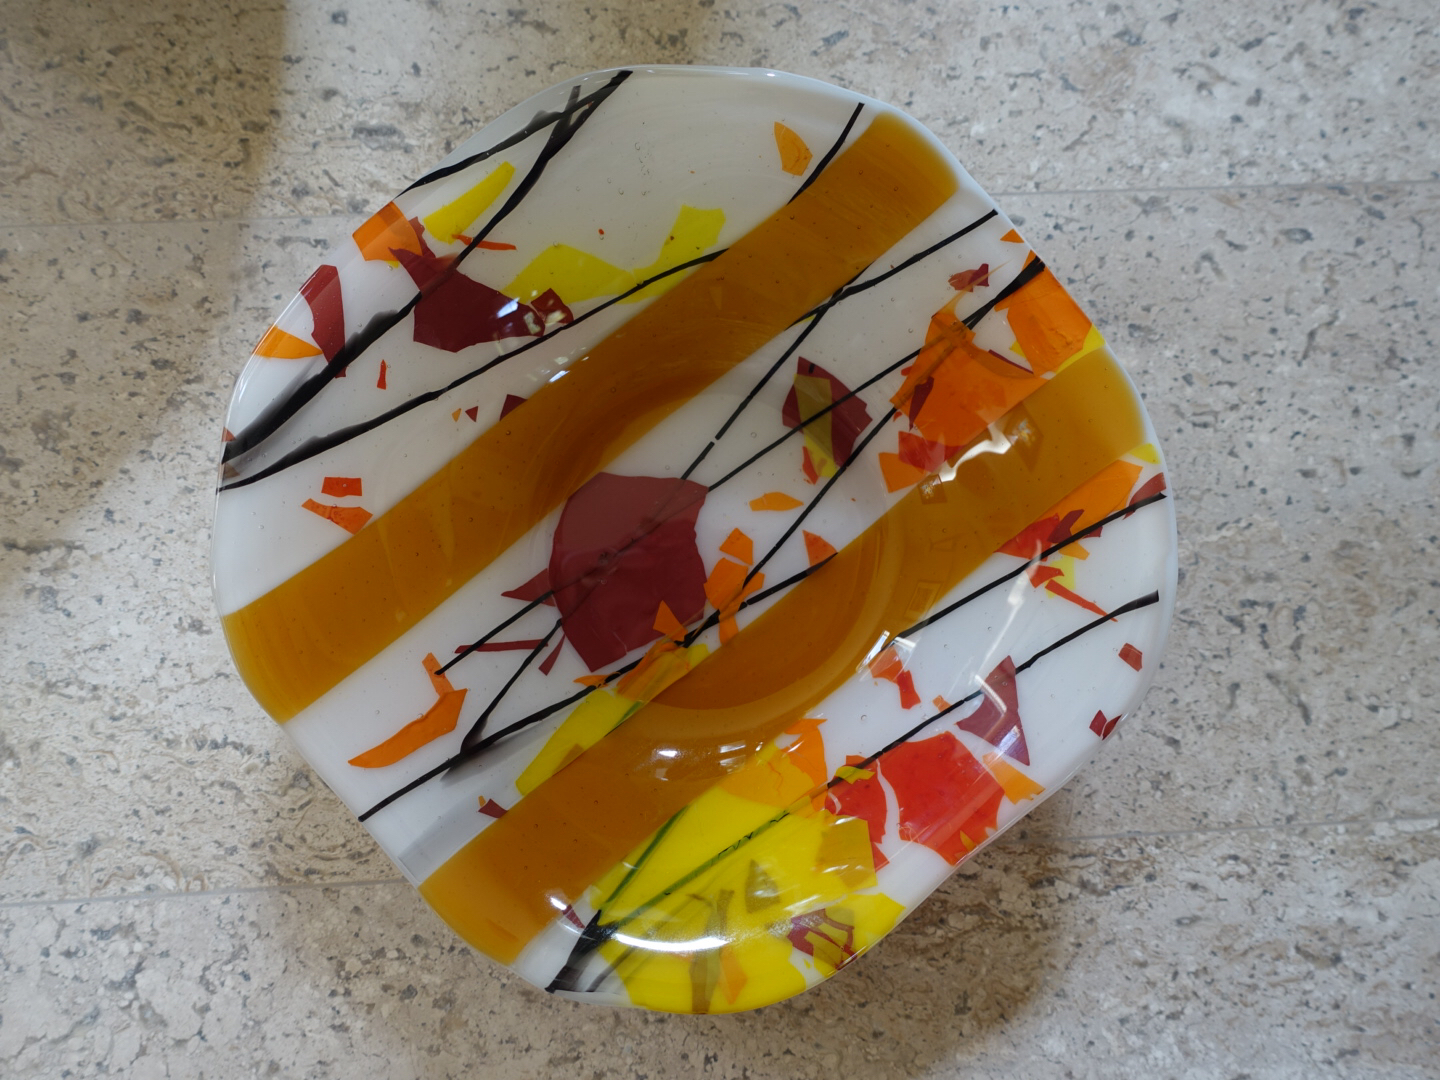
It was the right time to use my special piece of glass I've been saving. With Fall in the air these colors are perfect. I decided to make this 9x12 platter to show off the contrast between the transparent glass and the opaque glass. IM happy with the outcome.

I also made this smaller plate that can be a cheese plate, a candle plate or just a decorative piece. I hand made the glass designs with glass powder and fused it then I slumped it in the same mold as the platter above. Being that the piece was much smaller I placed it crosswise in the middle of the mold. This way I made use of my mold to make two different dishes. As you can see in the second photo it can also stand on edge for a free standing decorative piece. I will use this idea in the future to make a decorative floral or landscape.